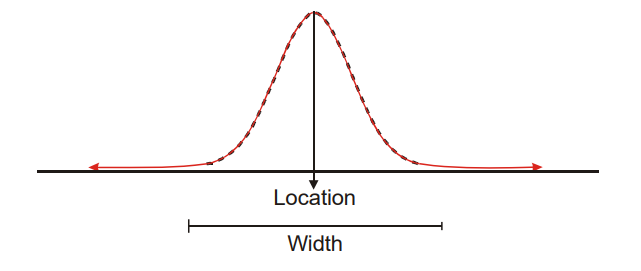
For most measurement processes, the total measurement variation is usually described as a normal distribution. Normal probability is an assumption of the standard methods of measurement systems analysis. In fact, there are measurement systems that are not normally distributed. When this happens, and normality is assumed, the MSA method may overestimate the measurement system error. The measurement analyst must recognize and correct evaluations for non normal measurement systems.(Measurement Process Variation)
Accuracy
Accuracy is a generic concept of exactness related to the closeness of agreement between the average of one or more measured results and a reference value. The measurement process must be in a state of statistical control, otherwise the accuracy of the process has no meaning.
In some organizations accuracy is used interchangeably with bias. The ISO (International Organization for Standardization) and the ASTM (American Society for Testing and Materials) use the term accuracy to embrace both bias and repeatability. In order to avoid confusion which could result from using the word accuracy, ASTM recommends that only the term bias be used as the descriptor of location error. This policy will be followed in this text.
bias
Bias is often referred to as “accuracy.” Because “accuracy” has several meanings in literature, its use as an alternate for “bias” is not recommended.
Bias is the difference between the true value (reference value) and the observed average of measurements on the same characteristic on the same part. Bias is the measure of the systematic error of the measurement system.
It is the contribution to the total error comprised of the combined effects of all sources of variation, known or unknown, whose contributions to the total error tends to offset consistently and predictably all results of repeated applications of the same measurement process at the time of the measurements.

Possible causes for excessive bias are:
Instrument needs calibration
Worn instrument, equipment or fixture
Worn or damaged master, error in master
Improper calibration or use of the setting master
Poor quality instrument – design or conformance
Linearity error
Wrong gage for the application
Different measurement method – setup, loading, clamping, technique
Measuring the wrong characteristic
Distortion (gage or part)
Environment – temperature, humidity, vibration, cleanliness
Violation of an assumption, error in an applied constant
Application – part size, position, operator skill, fatigue, observation
error (readability, parallax)
The measurement procedure employed in the calibration process (i.e., using “masters”) should be as identical as possible to the normal operation’s measurement procedure.
Stability
Stability (or drift) is the total variation in the measurements obtained with a measurement system on the same master or parts when measuring a single characteristic over an extended time period. That is, stability is the change in bias over time.

Possible causes for instability include:
Instrument needs calibration, reduce the calibration interval
Worn instrument, equipment or fixture
Normal aging or obsolescence
Poor maintenance – air, power, hydraulic, filters, corrosion, rust,
cleanliness
Worn or damaged master, error in master
Improper calibration or use of the setting master
Poor quality instrument – design or conformance
Instrument design or method lacks robustness
Different measurement method – setup, loading, clamping, technique
Distortion (gage or part)
Environmental drift – temperature, humidity, vibration, cleanliness
Violation of an assumption, error in an applied constant
Application – part size, position, operator skill, fatigue, observation
error (readability, parallax)
Linearity
The difference of bias throughout the expected operating (measurement) range of the equipment is called linearity. Linearity can be thought of as a change of bias with respect to size.

Note that unacceptable linearity can come in a variety of flavors. Do not assume a constant bias.

Possible causes for linearity error include:
Instrument needs calibration, reduce the calibration interval
Worn instrument, equipment or fixture
Poor maintenance – air, power, hydraulic, filters, corrosion, rust, cleanliness
Worn or damaged master(s), error in master(s) – minimum/ maximum
Improper calibration (not covering the operating range) or use of the setting master(s)
Poor quality instrument – design or conformance
Instrument design or method lacks robustness
Wrong gage for the application
Different measurement method – setup, loading, clamping, technique
Distortion (gage or part) changes with part size
Environment – temperature, humidity, vibration, cleanliness
Violation of an assumption, error in an applied constant
Application – part size, position, operator skill, fatigue, observation error (readability, parallax)
source of Measurement Process Variation: Analysis of measurement systems
